Creating a dining room table tailored to your taste and needs can be a rewarding DIY project. A personalized dining table not only adds character to your space but also allows you to showcase your craftsmanship and creativity. Whether you prefer a rustic farmhouse style, a sleek modern industrial look, or an upcycled masterpiece, building your table offers endless possibilities. This guide will provide you with practical ideas, step-by-step instructions, and expert tips for crafting your perfect dining table. From selecting the right materials and tools to adding functional features and unique finishes, we will walk you through the entire process. Embrace the satisfaction of creating a beautiful, functional piece that reflects your personality and complements your home. Let’s dive into the world of DIY dining room tables and transform your dining space into something truly special.
1. Planning Your DIY Dining Table
The first step in crafting your dining room table is thorough planning. Start by assessing your needs and the available space in your dining area. Consider the size of your family, how often you entertain guests, and the typical use of the table. This evaluation will help you determine the ideal dimensions and seating capacity for your table. Next, choose a design and style that complements your home’s decor.
Whether you prefer a classic, rustic, modern, or eclectic look, ensure the design aligns with your aesthetic preferences. Finally, selecting appropriate materials is crucial for both durability and appearance. Popular choices include hardwoods like oak, maple, and walnut, which provide strength and a beautiful finish. By carefully planning these aspects, you set a solid foundation for a successful DIY dining table project that meets your functional and stylistic needs.
2. Tools and Materials Needed
Embarking on a DIY dining table project requires a comprehensive list of tools and materials to ensure a smooth process. Essential tools include a circular saw or table saw for cutting wood, a drill and driver for assembling parts, a sander for smoothing surfaces, and clamps to hold pieces in place while the glue sets. Additionally, having a tape measure, square, and level on hand is vital for accurate measurements and alignment.
Common materials for DIY dining tables are hardwoods like oak, maple, and walnut, known for their durability and attractive grain patterns. For a more rustic or industrial look, consider reclaimed wood or metal accents. Sourcing quality materials is crucial; visit local lumberyards, hardware stores, or online suppliers to find the best options. By investing in high-quality materials and reliable tools, you’ll ensure your DIY dining table project is both enjoyable and successful.
3. Step-by-Step Guide to Building a Basic Wooden Table
Constructing a basic wooden table involves several key steps. Start by cutting your chosen wood to the desired lengths for the tabletop, legs, and supports. Use a circular saw for precise cuts. Assemble the tabletop by aligning the boards and securing them with wood glue and clamps, then reinforce them with screws. Next, attach the legs to the tabletop using brackets or pocket holes, ensuring they are evenly spaced and level. For added stability, install cross supports between the legs. Sand the entire table to smooth out any rough edges and prepare it for finishing. Apply a stain or paint of your choice, followed by a protective sealant to enhance durability. Common mistakes to avoid include uneven cuts, misaligned legs, and inadequate sanding. By following these steps carefully, you’ll create a sturdy and attractive wooden table.
4. Creating a Rustic Farmhouse Table
A rustic farmhouse table is characterized by its sturdy construction and charming, weathered appearance. To build one, start with thick, solid wood boards for the tabletop and robust, square legs. Begin by cutting the wood to size and assembling the tabletop, using wood glue and clamps to secure the boards together, then reinforcing them with screws. Attach the legs to the tabletop using sturdy brackets or pocket holes, ensuring they are evenly spaced and stable. For the rustic look, distress the wood by gently hitting it with a hammer, using a wire brush, or creating small cuts and dents. Sand the table to smooth out rough spots, then apply a dark stain to enhance the distressed features. Finally, seal with a matte finish for a worn-in, antique look. This process creates a farmhouse table that combines durability with rustic charm.
5. Building a Modern Industrial Table
An industrial modern dining room table blends the sleekness of metal with the warmth of wood, creating a stylish and functional piece. To achieve this look, start with a thick wooden tabletop made from materials like oak or walnut. Cut the wood to your desired dimensions and sand it smooth. For the base, use metal pipes or steel legs, which can be found at most hardware stores.
Assemble the metal base by connecting the pipes or welding the steel legs, ensuring they are stable and level. Attach the wooden top to the metal base using strong brackets or screws. To enhance the industrial aesthetic, finish the wood with a clear or lightly tinted sealant and leave the metal elements in their raw state, or coat them with a clear lacquer to prevent rust. This combination of metal and wood, along with minimalist lines, epitomizes the modern industrial style.
6. Upcycling Materials for a Unique Table
Upcycling materials like reclaimed wood, old doors, and metal scraps can create a unique, eco-friendly dining table. Using these materials not only reduces waste but also adds character and history to your piece. For instance, an old door can be repurposed as a tabletop, sanded, and refinished for a rustic charm. Reclaimed wood from barns or pallets offers a weathered look that’s perfect for a farmhouse style. Metal scraps can be used for legs or decorative accents, adding an industrial touch. Upcycling promotes sustainability by giving new life to old materials and reducing the need for new resources. Let your creativity flow by mixing and matching different textures and colors, and incorporating elements like glass or tile inlays for a truly personalized and environmentally conscious table design.
7. Customizing Table Legs and Bases
Customizing table legs and bases offers a chance to personalize your DIY dining table. Various styles, such as tapered, turned, and trestle legs, can drastically change the table’s look. Choosing the right leg design involves considering your table’s overall style and the desired aesthetic, whether modern, rustic, or traditional. For instance, sleek, straight legs suit a modern desk, while turned legs add elegance to a classic design. DIY construction techniques include using metal pipes for an industrial feel or crafting wooden legs with a jigsaw for intricate designs. Ensuring stability is crucial, so use strong joints and brackets. By customizing the legs and bases, you can create a unique table that perfectly fits your space and style, blending functionality with artistic expression.
8. Adding Functional Features
Enhancing your DIY dining table with functional features can significantly increase its utility. Incorporate storage options like built-in drawers or shelves to keep essentials handy and reduce clutter. For flexibility, consider adding extendable leaves, which can be seamlessly integrated to accommodate more guests when needed. To build multifunctional tables, design a desk that can double as a workspace, incorporating features like hidden compartments for office supplies or a fold-out section for a laptop. These additions not only optimize the table’s functionality but also make it a versatile centerpiece in your home, blending practical use with innovative design.
8. Finishing Techniques for DIY Tables
Finishing your DIY table involves staining, painting, and sealing to enhance its look and durability. Choose from stains that highlight the wood grain, paints in various colors, or a combination for a two-tone effect. To achieve different finishes, opt for a matte finish for a modern look, a gloss for a polished shine, or distressing techniques for a vintage feel. Protect your desk from wear and tear by applying a clear sealant like polyurethane or varnish, ensuring it can withstand daily use. These finishing touches not only elevate your table’s aesthetic appeal but also ensure it remains a functional and long-lasting piece in your home.
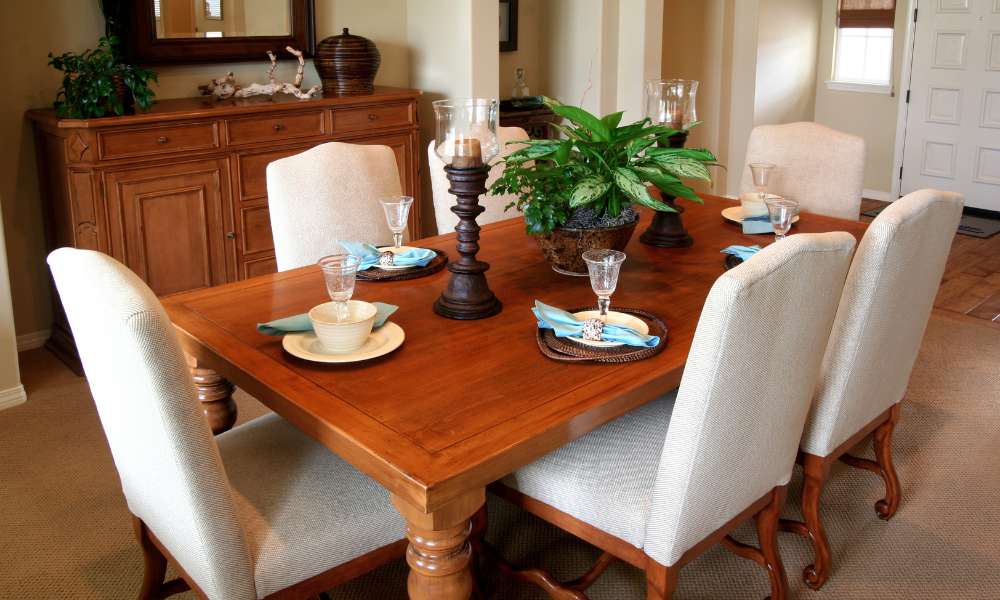
9. DIY Table Décor and Accessories
Enhance your DIY table with custom décor and accessories. Create matching benches and chairs using similar materials and finishes for a cohesive look. Design unique centerpieces, like handcrafted vases or seasonal decorations, to add charm and style. Personalize your desk with touches like monogrammed placemats, custom napkin holders, or engraved details. These additions not only complement your desk but also reflect your personality and creativity, making your dining space truly special. By incorporating thoughtful décor and accessories, you can elevate the functionality and aesthetic of your DIY table, creating a welcoming and personalized dining experience.
10. Budgeting and Cost-Saving Tips
Budgeting is crucial for a successful DIY table project. Start by estimating the cost of materials and tools, considering wood, metal, screws, and finishes. Save money by purchasing materials during sales or using reclaimed wood. Opt for borrowing or renting tools if you don’t own them. Explore affordable resources like local hardware stores, online marketplaces, and salvage yards for deals. Compare prices and quality before buying. By carefully planning and seeking cost-effective options, you can build a beautiful DIY desk without overspending, ensuring your project stays within budget while achieving a high-quality result.
11. Safety Tips for DIY Projects
Safety is paramount in DIY projects. Equip yourself with essential safety gear: gloves, goggles, ear protection, and a dust mask. When using power tools, follow the manufacturer’s guidelines and ensure the tools are in good working condition. Keep your workspace well-lit and clutter-free to avoid trips and falls. Be cautious of common hazards like sharp edges, splinters, and toxic fumes from paints and sealants. Always disconnect power tools when not in use and keep them out of reach of children. By adhering to these safety practices, you can minimize risks and ensure a safe and enjoyable DIY desk-building experience.
12. Showcasing Your Finished Table
Once your DIY table is complete, showcase it with quality photographs. Use natural light and a clean background to highlight its details. Share your project on social media and DIY communities to inspire others and gain feedback. Engage with fellow DIY enthusiasts for tips and creative ideas, enhancing your skills and connecting with a supportive community. These steps not only celebrate your hard work but also help you learn and grow in your DIY endeavors.
Conclusion
Creating a DIY dining table is a rewarding project that combines creativity, craftsmanship, and functionality. By carefully planning, selecting quality materials, and incorporating unique design elements, you can build a desk that perfectly suits your style and needs. Whether you opt for a rustic farmhouse look, a modern industrial design, or an upcycled masterpiece, the process allows you to create a piece that reflects your personality and enhances your home. Embrace the journey, enjoy the hands-on experience, and take pride in showcasing your finished table. Happy crafting!