Building your personal eating bench is a profitable task that lets you craft a bit ideally suited to your region and fashion. While buying a prepared-made bench is accessible, Dyeing offers you control over every element—from length and materials to layout and finish. The pleasure of making something particular for your private home gives a non-public contact for your dining location. Plus, a custom bench offers flexibility, growing a relaxed, inviting atmosphere for meals. Whether you choose out a minimalist appearance or something extra tricky, this project can help elevate your dining room while sharpening your woodworking skills. Build a bench for your dining table to enjoy a unique and functional piece that perfectly fits your space and style.
A. Choosing the Right Wood for Durability and Style:
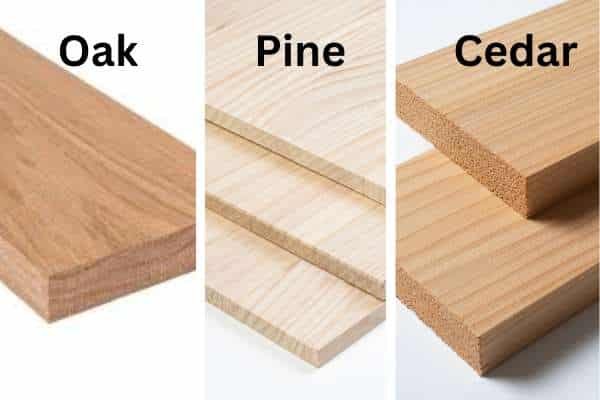
Selecting the best wood is important for the durability and look of your eating bench. Hardwoods like oak, walnut, and maple are acknowledged for his or her power and sturdiness, making them ideal for a bench, a good way to see each day’s use. Oak, especially, gives a undying, rustic feel, including warmth and character to any room.
If you’re looking for an extra finances-pleasant option, softwoods like pine or cedar can nonetheless create a lovely and robust bench, even though they’ll require a chunk greater maintenance over time. Both kinds of timber have their benefits, relying on your desires and budget.
B. Essential Tools for Building Your Dining Bench:

To build a dining table bench, you’ll need the following tools:
- Saw: For cutting your wood pieces to the correct size and shape.
- Drill: To create holes for screws and fasten parts securely.
- Measuring Tape: To ensure accurate measurements for a perfect fit.
- Sandpaper: For smoothing the wood and creating a polished, professional finish.
- Wood Glue: To bond pieces together and strengthen the joints.
- Screws: To secure the components, ensuring stability and durability.
- Clamps: To hold pieces together while the glue dries, ensuring proper alignment.
- Power Sander (optional): For a faster, smoother finish, especially on larger surfaces.
C. Setting Up Your Workspace: The Key to a Smooth DIY Experience:
Creating the proper workspace is vital for a fulfilling DIY venture. Choose for an easy, spacious place with pinnacle lights, so you can without issue see your measurements and artwork without straining. Keep your tools within arm’s reach and make certain you’ve got enough room to move freely even as you narrow, sand, and acquire.
Protect your floors with the aid of the usage of laying down a drop material to seize any sawdust or particles. Clearing away vain gadgets will assist you stay focused and decrease the threat of accidents.
D. Measuring and Planning: Precision is Everything:
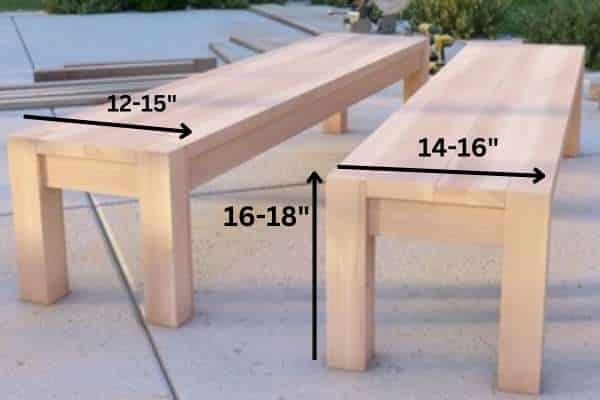
Here’s where things get serious—getting the measurements right. The dimensions of your bench should complement your dining table. Standard dining benches range from 16 to 18 inches in height, but don’t be afraid to adjust according to your space and needs.
The depth typically falls between 12 and 15 inches, but again, tailor it to fit your preferences. How deep should a dining bench be? The depth should allow for comfortable seating, typically around 14 to 16 inches, but you can adjust it based on the comfort level you desire.
Want a snug, intimate seating area? Make it narrower. If you’re hosting large family meals, consider a wider design to ensure everyone fits comfortably.
E. Cutting Your Wood: A Step-by-Step Guide:
- Measure Twice, Cut Once: Ensure all your measurements are accurate before cutting to avoid mistakes.
- Use a Square for Accuracy: Mark your cut lines with a square to keep everything straight and aligned.
- Take Your Time: For tougher materials, make several smaller cuts rather than one big one to maintain control.
- Clamp Your Wood: Secure your wood with clamps to prevent slipping and ensure a clean, precise cut.
- Double-Check Your Cuts: After cutting, measure again to ensure your pieces fit together perfectly.
- Cut Slowly and Steadily: A steady hand and patient approach will result in smoother, more accurate cuts.
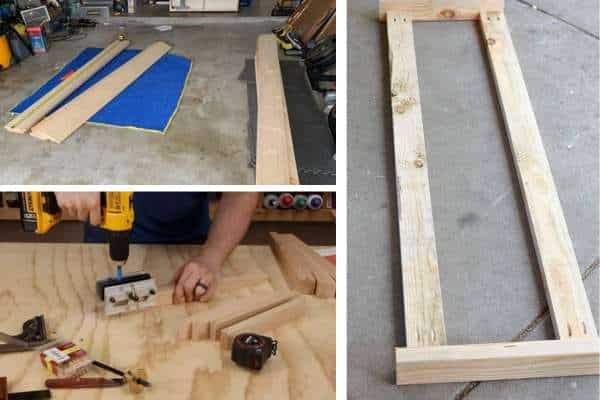
F. Assembling the Bench: Building the Foundation:
Now that your portions are cut, it is time to carry everything collectively. Start through attaching the aspect portions to the seat, making sure the joints are aligned nicely for a sturdy body.
Wood glue is crucial—it now not handiest strengthens the relationship but additionally facilitates preserving the portions in place even as you stabilize them. Once the glue has been applied, observe it with screws to ensure a strong, lasting preserve.
Don’t pass the pre-drilling step! It’s important for stopping the timber from splitting and ensuring an easy, tight match. Take your time to make certain everything is perfectly aligned earlier than moving on to the following step.
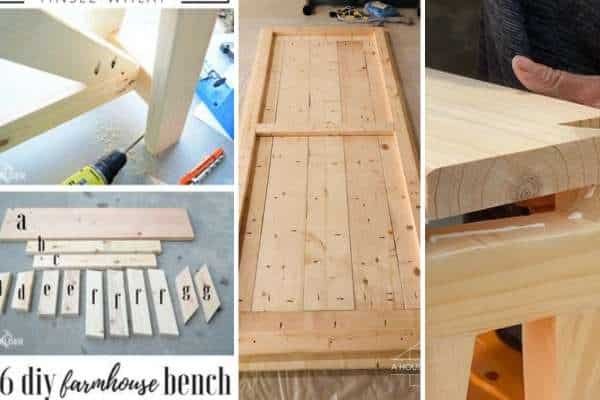
1. Adding the Legs: Stability Meets Style:
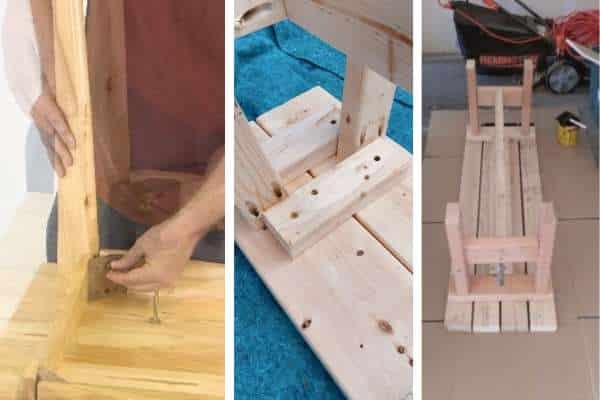
Now, onto the legs. Measure them carefully to ensure each one is the same length. The last thing you want is an uneven bench. Attach the legs to the seat frame, using screws or dowels for maximum stability.
Whether you buy pre-made legs or make your own, they should be securely fastened to ensure the bench stays steady for years to come.
When it comes to style, the choice is yours: sleek and modern with simple straight legs, or more decorative with carved, turned styles for a vintage touch.
2. Sanding and Finishing: Make It Smooth:
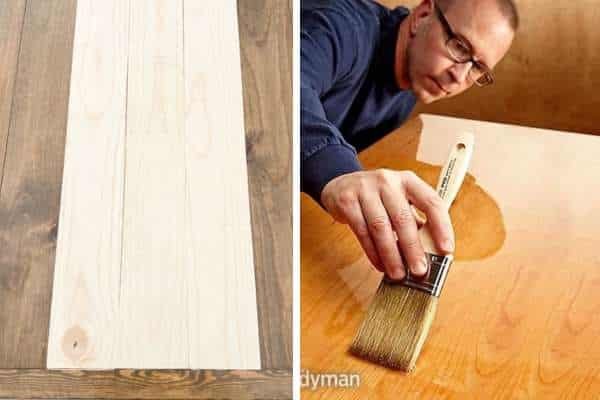
Sanding is crucial. Start with a coarser grit to remove any rough spots, then work your way down to finer grits for that perfect, smooth finish. Sanding may take time, but it’s worth every minute.
A power sander can speed things up, but remember to always go with the grain to prevent damage. Once your bench is as smooth as butter, it’s time for the finish.
Whether you go with a glossy lacquer or a rustic wood stain, applying a protective layer will keep your bench looking pristine for years. Take your time to apply it evenly, and allow for drying between coats.
3. Upholstering for Comfort: Adding a Cushion:
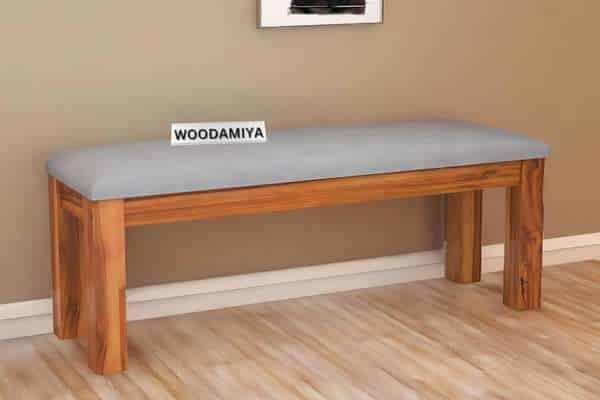
Want to make your bench extra comfy? Upholstering a cushion is a fantastic option. Simply cut foam to fit the seat, then cover it with fabric that compliments your decoration. Secure the fabric with staples or upholstery tacks, and voilà—you’ve got a plush, inviting place to sit.
4. Personalizing Your Bench: Adding the Final Touches:
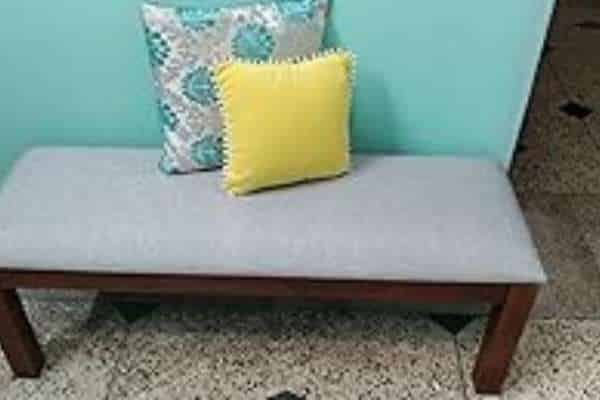
Now for the fun part—decorating your bench! Pillows, throws, and blankets are an easy way to add personality and color. Experiment with textures and patterns that complement your dining room, creating a cohesive look that ties everything together. Whether you’re going for a minimalist aesthetic or something more boohoo, the options are endless.
5. Protecting Your Bench: Long-Lasting Beauty:
To make sure your bench stands the test of time, protect it with a sealer or wax. This will guard against spills, scratches, and wear. Regular maintenance is simple: just wipe down the surface and reapply a fresh coat of finish as needed.
6. Common Mistakes to Avoid:
- Can lead to a bench that doesn’t fit your table or space.
- Ensure pieces are cut evenly for a professional finish.
- Use sharp tools for cleaner, safer cuts.
- Always double-check measurements before making any cuts.
7. Troubleshooting: Fixing Issues as They Arise:
Sometimes things don’t go according to plan, but don’t fret. If your bench isn’t level, it’s usually because the legs are uneven. Grab a level and check each one. If needed, trim them down to the correct length. For other minor hiccups, tightening screws or adding extra support can often do the trick.
8. Cost Breakdown: What to Expect to Spend:
Building your own bench is generally more affordable than buying one from the store. Depending on the materials you choose, expect to spend anywhere from $50 to $200. If you’re on a budget, pine is a cost-effective option that still delivers a great result.
9. Time Commitment: How Long Will It Take?
The time required depends on your experience. For beginners, expect to spend 6 to 10 hours. If you’re working with a more intricate design, allow extra time for sanding, assembling, and finishing. By breaking the project down into manageable steps, you’ll stay on track and enjoy the process.
FAQ
Are benches a good idea for a dining table?
Yes, benches may be an extraordinary concept for an eating table, supplying each style and functionality. They maximize seating by means of accommodating more human beings than character chairs, making them ideal for large households or gatherings.
Benches also create a more informal, bendy dining revel in, as they can without problems be moved round or tucked underneath the table to save area. Additionally, benches can add a unique, rustic, or contemporary touch to your eating room, relying on the layout and fabric you pick.
How big should a bench be for a dining table?
The size of a bench for a dining table depends on the dimensions of the table and the space available. As a general guideline:
- Length: A dining bench should be about 2/3 the length of your dining table. For example, if your table is 72 inches long, aim for a bench that is around 48 inches in length to ensure comfortable seating.
- Height: Standard dining benches typically range from 16 to 18 inches tall, which aligns with the height of most dining tables. However, you can adjust the height based on your seating preferences or table height.
- Depth: The depth of a dining bench usually falls between 12 to 15 inches, but it can vary depending on how much seating space you want. A wider bench (around 16 inches or more) is great for larger families, while a narrower bench (around 12 inches) is ideal for more intimate settings.
Always remember to measure your dining table and the surrounding space before finalizing the size to ensure a comfortable fit.
What materials do I need to build a bench for a dining table?
To build a bench for a dining table, you’ll need the following materials:
- Wood for the seat: Hardwood (like oak, maple, or walnut) or plywood are great choices for the bench seat. Choose a sturdy material that can withstand regular use.
- Wood for the legs: You can use the same type of wood as the seat, or a contrasting wood for added design flair.
- Screws: Wood screws to assemble the frame and attach the seat.
- Wood glue: For securing joints and ensuring a strong, lasting bond.
- Sandpaper: To smooth out rough edges and prepare the wood for finishing.
- Finish: Paint, stain, or polyurethane to protect the wood and give the bench a polished look.
- Optional: Cushioning or fabric if you want to add padding to the seat for extra comfort.
These materials, along with basic woodworking tools like a saw, drill, and measuring tape, For your table will help build a sturdy and stylish dining bench .
Conclusion
Building a dining bench from scratch is more than simply a practical venture—it’s a risk to add a non-public touch to your home and sharpen your woodworking capabilities. With a little time, staying power, and creativity, you’ll come with a useful, stylish bench that’s a real mirrored image of your craftsmanship. So, move in advance—make the leap, and let the arena of DIY furnishings remodel your area.