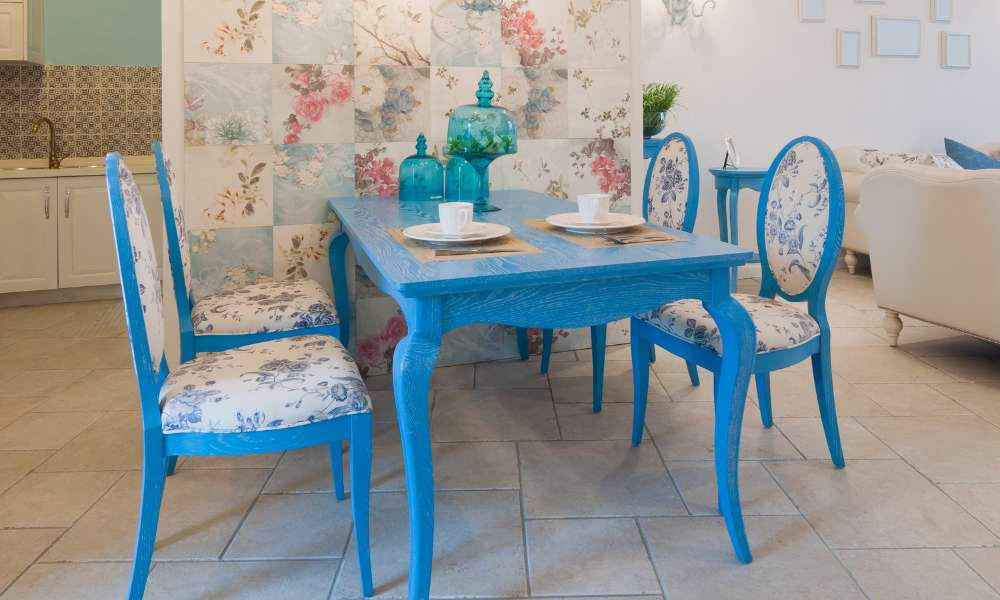
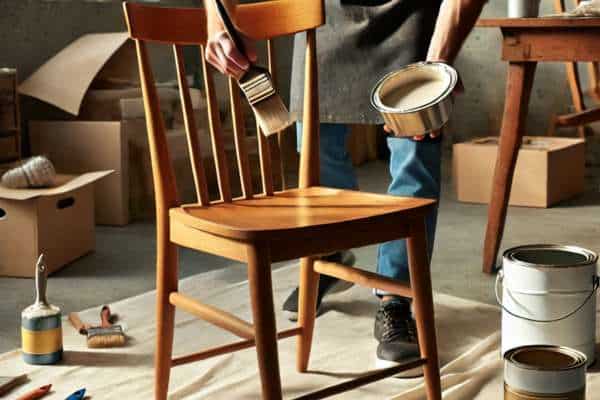
Painting ingesting chairs is a remarkable way to refresh your eating area with out the rate of buying new fixtures. Whether you need to replace the colour scheme or restore antique chairs, analyzing the way to color consuming chairs can supply your region an entire new look. This manner isn’t always simplest price-effective but moreover allows for a non-public contact, making sure your chairs in shape your style perfectly. With the right tools and strategies, you can gather a professional-searching give up result that complements your eating room’s enchantment. Let’s get started out on reworking your paint dining chairs into beautiful, custom portions.
1. Choose the Right Paint Type:
Identify Chair Material:
- Select Paint for Wood: Use latex or acrylic paint for wood chairs. These paints are durable and provide a smooth finish.
- Choose Paint for Metal: For metal chairs, opt for oil-based or spray paints designed for metal. These paints adhere well and resist rust.
- Consider Fabric or Upholstered Chairs: If painting parts of upholstered chairs, use fabric paint or spray paint suitable for textiles.
Use Primer:
Always use a primer well suited along with your paint type to ensure higher adhesion and sturdiness.
By deciding on the right paint type, you make certain a professional end and long-lasting effects on your eating chairs. This step is crucial for accomplishing a fashionable and refreshed look in your eating region.
2. Gather Necessary Supplies:
Gathering necessary components is a essential step in studying a way to paint dining chairs. Here’s a easy listing of what you want:
- Paint: Choose the appropriate type based on your chair material (latex, acrylic, oil-based, etc.).
- Primer: Select a primer that matches your paint type to ensure better adhesion and durability.
- Brushes and Rollers: Use high-quality brushes and rollers suitable for the type of paint and the chair’s design.
- Sandpaper: Get various grits of sandpaper to smooth the surface and help the paint adhere better.
- Drop Cloths: Protect your workspace with drop cloths or old sheets.
- Protective Gear: Wear gloves, masks, and safety goggles to protect yourself from fumes and paint splatters.
- Cleaning Supplies: Have rags, a bucket of water, and mild detergent for cleaning the chairs before painting.
- Painter’s Tape: Use painter’s tape to cover areas you don’t want to paint.
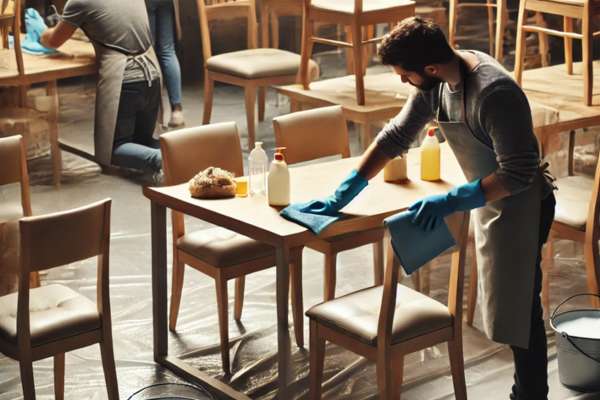
3. Prepare Your Workspace:
- Choose a Ventilated Area: Select a space with good airflow, such as a garage with open windows or an outdoor area, to ensure proper ventilation and safety.
- Lay Down Drop Cloths: Protect floors and surrounding surfaces by laying down drop cloths or old sheets. This will catch any paint drips or spills and make cleanup easier.
- Set Up Work Tables: If possible, use work tables or sawhorses to elevate the chairs. This makes it easier to paint all sides evenly and comfortably.
- Organize Supplies: Arrange all your painting supplies—paint, brushes, primer, sandpaper, and protective gear—within easy reach to streamline the process.
- Wear Protective Gear: Put on gloves, a mask, and safety goggles to protect yourself from paint fumes and splatters.
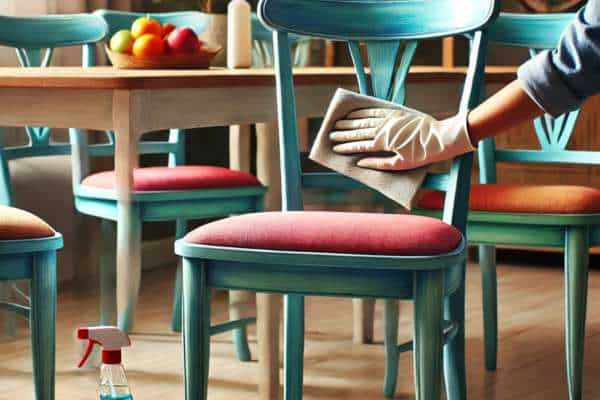
4. Cleaning The Chairs Thoroughly is Essential:
Start by way of casting off any cushions or accessories. Use a slight detergent combined with water to wipe down the entire chair, removing dirt, grease, and filth.
Pay unique attention to crevices and joints in which particles can acquire. After cleaning, rinse with smooth water and dry the chairs completely.
If the chairs have an antique finish, use a degreaser or mineral spirits to strip away any remaining residue.
Sand the surface gently to dispose of antique paint or varnish and create a easy, even floor for the new paint to adhere to. Wipe away any dirt with a tack cloth.
This thorough cleaning ensures that the paint will observe easily and cling properly, resulting in a beautiful lengthy-lasting end for your paint dining room chairs.
5. Sanding The Surface Is a Crucial Step:
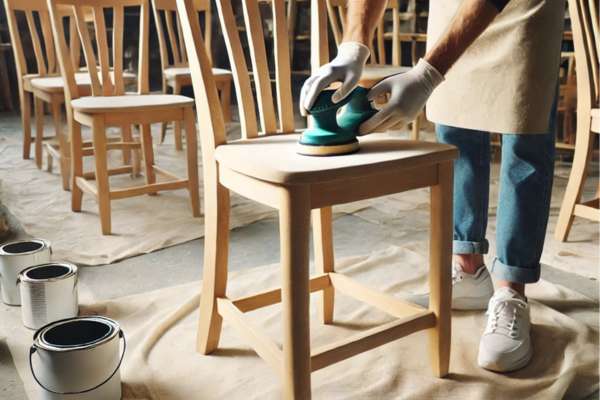
Start through the use of medium-grit sandpaper (round 120-a hundred and fifty grit) to gently sand the entire chair, specializing in regions with antique paint or varnish.
Sanding gets rid of any hard spots and creates a slightly textured floor that helps the new paint adhere better. Be positive to sand inside the path of the wood grain to avoid scratches.
After sanding, switch to finer-grit sandpaper (around 220 grit) for a smooth end. Once finished, wipe the chairs with a tack cloth to put off all dust and particles.
This education step ensures a clean, smooth floor for portray, ensuing in a greater expert and long-lasting finish.
6. Applying Primer is a Vital Step:
Using a suitable primer helps make sure better paint adhesion and durability. Start by choosing a primer that suits your chair material, whether or not it’s wooden, metal, or plastic. Shake or stir the primer nicely earlier than software.
Use a broom or curler to apply a thin, even coat of primer to the entire chair, covering all surfaces. Pay unique attention to crevices and certain regions.
Allow the primer to dry absolutely, following the producer’s endorsed drying time. If wished, gently sand the primed floor with exceptional-grit sandpaper to easy any imperfections and wipe away dirt with a tack cloth.
This practice step creates a stable base for the paint, ensuring a smooth and lasting finish on your dining chairs.
7. Choose the Right Brush or Roller:
- Assess the Chair’s Design: Examine the chair’s structure and details. For intricate designs or detailed areas, opt for smaller, angled brushes.
- Match the Paint Type:
- For latex or acrylic paint, use synthetic brushes. They provide a smooth finish without brush marks.
- For oil-based paints, use natural bristle brushes for better coverage.
- Consider Rollers for Large Surfaces: If your chairs have large, flat surfaces, use a small foam roller to apply the paint evenly and quickly.
- Use Foam Brushes for Smooth Finish: Foam brushes are ideal for achieving a smooth, streak-free finish, especially on flat or contoured surfaces.
- Detail Brushes for Hard-to-Reach Areas: Use small detail brushes for corners, joints, and intricate carvings to ensure complete coverage.
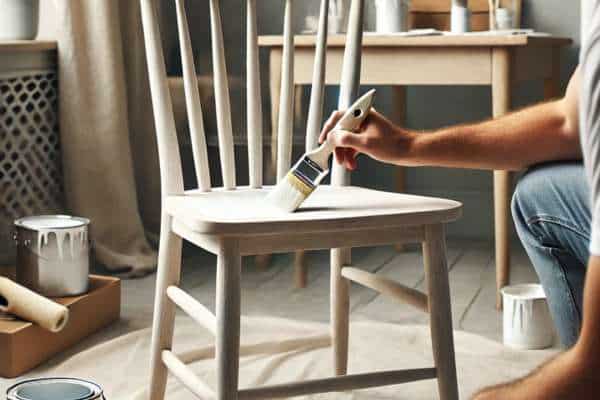
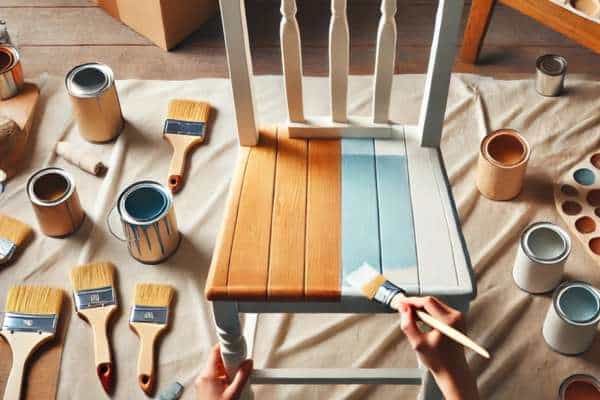
8. Applying a Base Coat is a Key Step:
Begin with the aid of stirring your preferred paint thoroughly to make certain an excellent consistency. Use a brush or roller to apply a thin, even base coat of paint to the entire chair.
Avoid making use of too much paint without delay, as this can lead to drips and choppy insurance. Make sure to cowl all areas, such as corners and particular sections.
Allow the base coat to dry completely in keeping with the paint producer’s commands, which generally takes some hours.
This initial layer gives a solid basis for next coats, ensuring better adhesion and a smoother end. Once the base coat is dry, check out for any overlooked spots or imperfections and gently sand if important earlier than making use of additional coats.
This cautious technique will bring about beautifully painted dining chairs with a professional-searching finish.
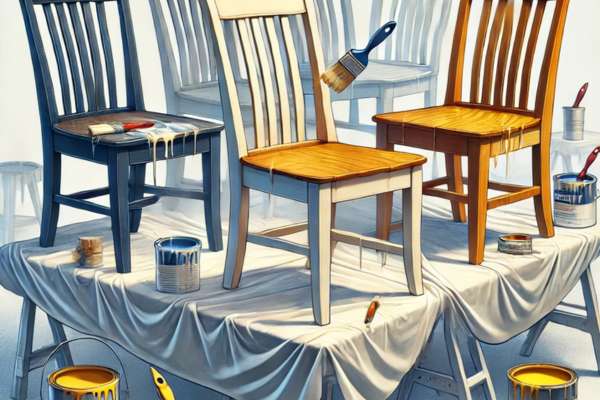
9. Applying Additional Coats is Crucial:
Applying additional coats is vital to obtain even insurance and a professional end. After the primary coat of paint has dried completely, inspect the chair for any thin spots or uneven areas.
Lightly sand the floor with exceptional-grit sandpaper to smooth out any imperfections and wipe away the dirt with a tack fabric. Apply a 2nd coat of paint, making sure you cowl all regions lightly.
Depending on the kind and coloration of the paint, you could want to apply a 3rd coat for complete coverage. Allow every coat to dry very well earlier than applying the next one.
This layering technique ensures a durable or even end, giving your dining chairs a refreshed and polished look in order to closing.
10. Drying And Curing The Paint is a Crucial Step:
Drying and curing the paint is a crucial step into ensure a durable and long-lasting finish. After applying each coat of paint, allow sufficient drying time as recommended by the paint manufacturer.
Typically, this means waiting at least 2-4 hours between coats, but it can vary depending on the type of paint and environmental conditions.
Rushing this process can lead to imperfections like smudges or uneven coverage. Once you’ve applied the final coat, it’s essential to let the paint cure completely.
This curing period allows the paint to harden and reach its maximum durability, which usually takes about 24-48 hours, but sometimes longer depending on the paint type.
Avoid using the chairs or placing any items on them during this time to prevent any damage. Proper drying and curing will ensure that your painted dining chairs have a smooth, professional-looking finish that stands up to everyday use.
11. Seal with a Protective Finish:
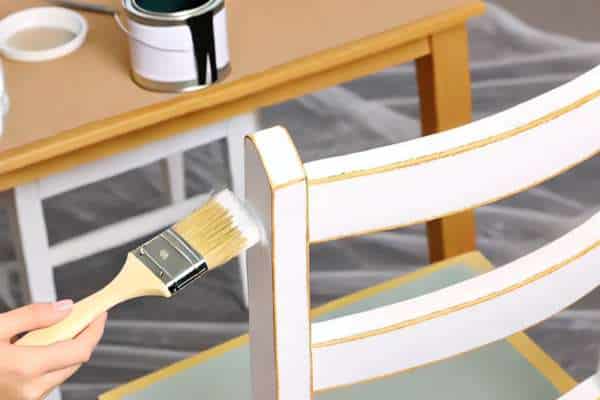
Sealing your painted dining chairs with a protective end is important to preserve the paint and decorate durability. After the paint has dried and cured completely, pick a clear sealant appropriate on your paint type.
For latex or acrylic paints, a water-primarily based polyurethane sealant works properly, at the same time as oil-based totally paints pair first-rate with oil-based totally polyurethane.
Start by shaking or stirring the sealant thoroughly. Using a remarkable brush or foam applicator, observe a thin, even coat of sealant over the entire chair, making sure all painted surfaces are covered.
Work in easy, constant strokes to avoid bubbles or streaks. Pay special attention to precise regions and joints to make sure whole coverage.
Allow the first coat to dry in keeping with the producer’s commands, generally 2-4 hours. For delivered safety, gently sand the surface with satisfactory-grit sandpaper among coats and wipe away the dust with a tack material.
Apply at least one more coat, allowing sufficient drying time among each. This shielding layer will protect your dining chairs from scratches, spills, and regular put on, ensuring they stay lovely and durable.
By sealing with a defensive finish, you could enlarge the lifestyles of your paint dining chairs and hold them searching fresh and colorful.
12. Reassemble and Inspect:
- Allow Complete Drying: Ensure the chairs are fully dry and the paint has cured before reassembling.
- Reattach Parts: Carefully reattach any removed parts, such as cushions, seats, or legs. Use the appropriate tools to secure everything firmly.
- Inspect the Paint Job: Examine the chairs closely for any missed spots, drips, or uneven coverage.
- Touch-Up: Use a small brush to touch up any imperfections or areas that need additional coverage.
- Final Check: Once all touch-ups are dry, give the chairs a final inspection to ensure a smooth and flawless finish.
13. Maintain Your Painted Chairs:
Maintaining your painted eating chairs is vital to keep them looking sparkling and colourful. Regular dusting with a soft, dry material facilitates prevent dust buildup. For deeper cleaning, use a moist fabric with mild cleaning soap and water, keeping off harsh chemical compounds that could damage the paint.
Promptly wipe up spills to prevent stains and recollect the usage of placemats or chair cushions to guard high-use regions. If you word any chips or scratches, touch them up with matching paint to hold a flawless appearance.
Additionally, keep away from exposing your chairs to direct sunlight for extended intervals, as UV rays can purpose the paint to fade.
14. Enjoy Your Refreshed Dining Space:
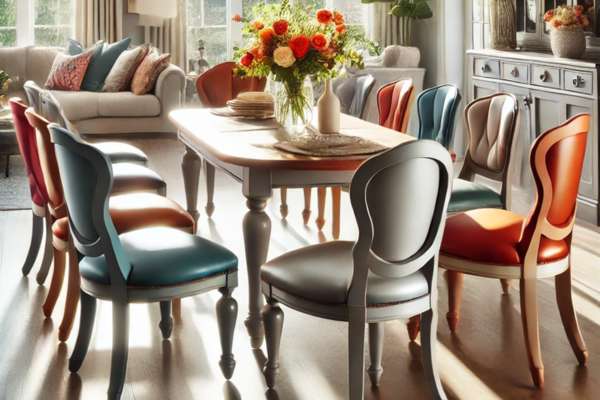
Enjoying your refreshed eating area is the worthwhile very last step in learning. Once your chairs are fantastically painted and reassembled, take a moment to comprehend the updated look and sense they convey in your dining vicinity.
The vibrant colorings and smooth finish can remodel the entire room, including a touch of your private style.
Invite own family and friends over to appreciate your handiwork and enjoy meals together on your revitalized area. The time and effort you invested in painting your dining chairs have paid off, developing an inviting and elegant surroundings.
Remember to hold your chairs through dusting regularly and touching up any minor put on, making sure they stay a standout characteristic in your home.
Conclusion:
Understanding how to paint eating chairs can remodel your dining area with a fashionable and refreshed appearance. By following those steps, you ensure a successful painting assignment: pick out the proper paint type, acquire vital supplies, put together your workspace, smooth the chairs very well, sand the surface, observe primer, pick the right brush or curler, and allow adequate drying time. After the paint has cured, seal with a protective finish, reassemble, and look into for contact-ups. Finally, maintain your painted chairs to hold them looking sparkling and colorful.