Refinishing a dining room table is a rewarding project that can breathe new life into a cherished piece of furniture. Over time, dining tables can become scratched, stained, or simply outdated, but with a bit of effort and the right techniques, you can restore your table to its former glory or even give it a fresh new look. This guide will walk you through the entire process, from preparing your workspace to applying the final coat of sealant. Whether you’re an experienced DIY enthusiast or a novice looking to tackle your first refinish project, this comprehensive step-by-step approach will ensure your dining room table looks stunning and serves your family for many more years to come.
Dining Table Finishing Requirements
Finishing a dining table requires meticulous attention to detail to ensure durability and a beautiful appearance. Start by selecting a high-quality finish, such as polyurethane, lacquer, or a water-based sealant, which offers excellent protection against spills, heat, and daily wear. Apply the finish in thin, even coats, allowing each layer to dry completely before lightly sanding with fine-grit sandpaper to achieve a smooth surface. Multiple coats are essential for a robust finish; typically, two to three layers are sufficient, but additional coats can be applied for extra protection.
Ensure proper ventilation during the application process to avoid fumes and promote even drying. Finally, allow the table to cure fully before use to ensure the finish hardens properly, providing long-lasting beauty and functionality. These requirements are crucial for achieving a professional, durable finish that enhances the table’s natural beauty and extends its lifespan.
Materials and Tools Needed
- Sandpaper
- Stain
- Sealant
- Sanders
- Brushes
- Rags
- Gloves
- Masks
- Goggles
1. Preparation
Proper preparation is essential for successfully refinishing a dining room table. Begin by clearing and cleaning your workspace to ensure you have plenty of room to move around and work efficiently. A clean, well-ventilated area is crucial for safety and comfort. Next, remove the table’s existing finish using a chemical stripper or sandpaper, depending on the type and condition of the old finish. This step might be time-consuming, but it’s vital for achieving a smooth, even surface. Once the old finish is removed, inspect the table for any damage such as scratches, dents, or cracks. Use wood filler to repair these imperfections, and sand the repaired areas until they are flush with the rest of the table. This thorough preparation sets the stage for a beautiful, long-lasting refinished table.
2. Sanding the Table
Sanding is a critical step in refinishing your dining room table, as it ensures a smooth, even surface for staining and sealing. Start by choosing the right sandpaper grit; begin with a coarse grit (around 60-80) to remove any remaining finish and surface imperfections, then gradually move to medium grit (120-150) to smooth out scratches from the coarse sandpaper. Finish with a fine grit (220) for a polished surface. Employ proper sanding techniques by sanding in the direction of the wood grain to prevent scratches and uneven surfaces. Use a sanding block or an electric sander for large, flat areas, and sand by hand in intricate areas to ensure thorough coverage. Consistently check your progress and feel the surface to ensure it is smooth and even, ready for the next steps of the refinishing process.
3. Cleaning the Sanded Surface
After sanding, it’s essential to thoroughly clean the surface to ensure a flawless finish. Start by removing all dust and debris using a vacuum with a brush attachment or a tack cloth, making sure to get into all the crevices and corners. Next, wipe down the entire table with a damp cloth to pick up any remaining particles. This step is crucial as any leftover dust can interfere with the stain and sealant, resulting in an uneven finish. Allow the table to dry completely before proceeding. Ensuring a clean, dust-free surface will help achieve a professional-looking result and enhance the overall appearance of your refinished dining room desk.
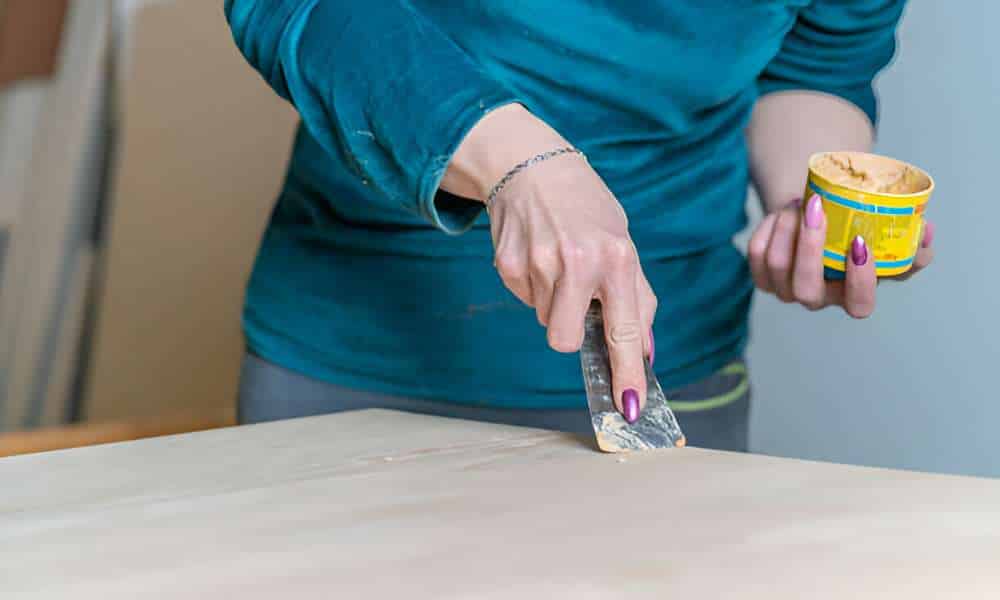
4. Applying the Stain
Applying the stain is a crucial step in achieving the desired look for your refinished dining room desk. Start by selecting the appropriate stain color that complements your decor and enhances the natural beauty of the wood. Before committing to the entire table, test the stain on a small, inconspicuous area to ensure it meets your expectations. Once satisfied, apply the stain evenly using a brush or cloth, working in the direction of the wood grain to prevent streaks and blotches. Immediately wipe off any excess stain with a clean cloth to ensure an even finish and avoid any sticky residue. Allow the stain to dry completely, following the manufacturer’s recommended drying time, to ensure a smooth, durable finish. This careful application process will result in a beautifully stained table that showcases the wood’s natural charm.
5. Sealing the Table
Sealing your dining room table is the final step to ensure it has a durable, long-lasting finish. Start by choosing the right sealant, such as polyurethane, lacquer, or a water-based finish, depending on your desired level of durability and shine. Apply the first coat of sealant evenly using a high-quality brush or foam applicator, following the direction of the wood grain. Allow the first coat to dry completely, then lightly sand the surface with fine-grit sandpaper to remove any imperfections and ensure a smooth finish. Wipe away any dust before applying additional coats. Typically, two to three coats are sufficient, but you can apply more if needed for extra protection. Allow each coat to dry and sand lightly between applications. This process will give your table a beautiful, protective finish that highlights the wood’s natural beauty.
6. Finishing Touches
The final step in refinishing your dining room desk involves adding those finishing touches that ensure a professional look. Begin by inspecting the table for any missed spots or imperfections. Look for uneven areas or bubbles in the finish and address them as needed. Perform a final light sanding with very fine-grit sandpaper to achieve an ultra-smooth surface. This sanding should be gentle to avoid removing any of the sealant. After sanding, thoroughly clean the table to remove any dust, using a tack cloth or a damp microfiber cloth. Finally, polish the desk with suitable furniture polish to enhance its shine and protect the finish. These meticulous finishing touches will give your table a flawless appearance, ensuring it looks stunning and is ready for use.
7. Reassembling and Placing the Table
After completing the refinishing process, it’s time to reassemble and place your dining room desk back in its spot. Begin by reattaching any parts you removed, such as legs or leaves, ensuring they are securely fastened. Carefully move the table back to its designated place, enlisting help if necessary to avoid damaging the newly finished surface. To maintain the table’s fresh look, use coasters and placemats to protect against scratches and spills. Regularly dust the table with a soft cloth, and occasionally polish it to preserve the shine. Avoid placing hot items directly on the surface and use tablecloths or pads for added protection. By following these tips, you can keep your refinished dining room desk looking beautiful for years to come.
Conclusion
Refinishing a dining room table is a rewarding project that can rejuvenate your space and give a cherished piece of furniture a new lease on life. By carefully preparing your workspace, sanding the surface, cleaning thoroughly, applying stain, sealing the finish, and adding final touches, you can achieve professional results. Reassembling and maintaining your desk ensures it remains beautiful and functional for years. With patience and attention to detail, you can transform your dining room desk into a stunning centerpiece that showcases your craftsmanship and enhances your home’s décor. Embrace the process and enjoy the satisfaction of a job well done, knowing you have created a beautiful and durable piece for your family to enjoy.