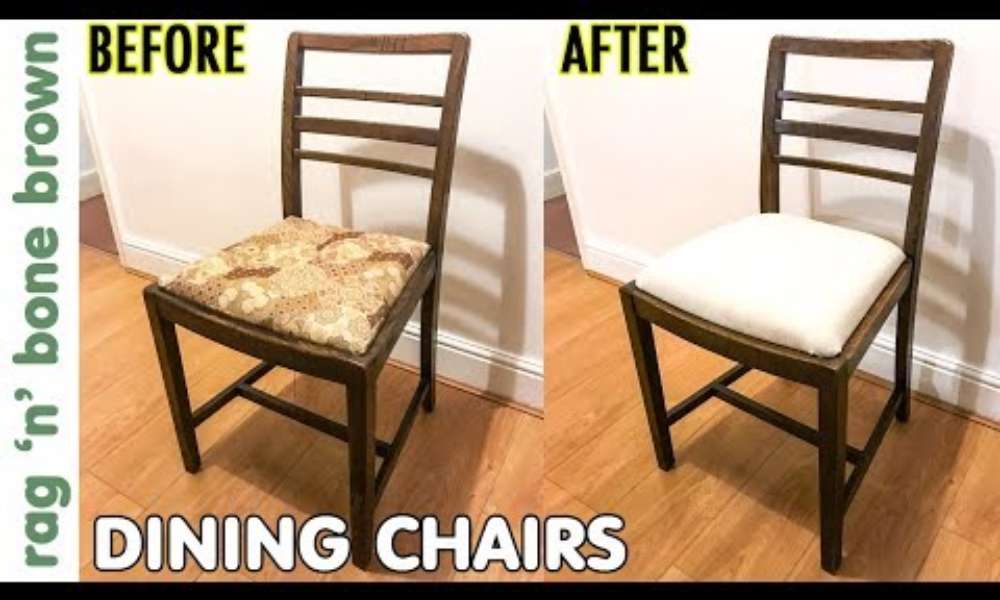
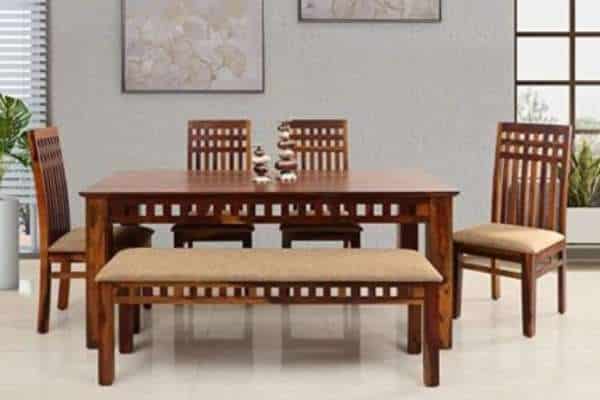
Refinishing eating chairs is a superb manner to give your eating room a fresh, up to date appearance with out the rate of buying new fixtures. Over time, eating chairs can become scratched, faded, or worn, making them appearance vintage and tired. Refinishing allows you to restore their unique beauty or even give them a new style that matches your present day decoration. This manual will stroll you thru the important steps to gain a professional-first-rate refinish, ensuring your dining chairs appearance as exact as new.
1. Preparing Dining Chairs for Refinishing Process:
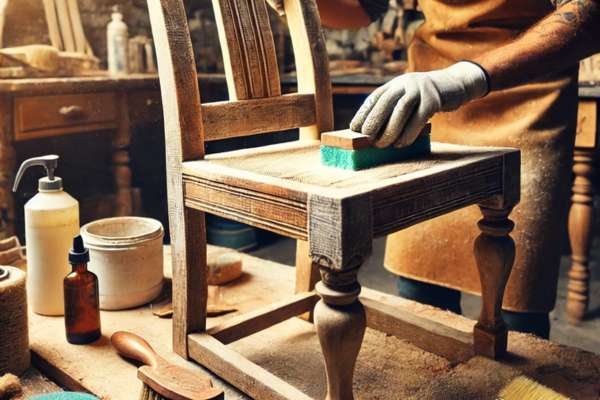
Proper coaching is vital for achieving a easy, professional end. Start by very well cleaning the chairs to take away any dirt, grease, or vintage polish.
Use a slight cleaning soap and water answer, then let the chairs dry absolutely. Once easy, check out the chairs for any loose joints, cracks, or damages. Repair those troubles to make certain stability for the duration of and after refinishing.
Next, remove any existing end using sandpaper or a chemical stripper. Sand the surface lightly, beginning with a rough grit and moving to finer grits to create a easy base. This step is crucial for the new finish to stick well.
2. Essential Tools Needed to Refinish Chairs:
To successfully refinish dining chairs, having the right equipment is critical. These gear will help you reap a clean and professional end. Here’s a listing of the simple equipment you’ll want:
- Sandpaper
- Electric Sander
- Paint or Finish Remover
- Putty Knife
- Wood Filler
- Paintbrushes
- Stain or Paint
- Protective Gear
3. Step-by-Step Guide for Sanding Chairs:
Sanding is a essential step in the method of refinishing dining chairs. It facilitates to dispose of the old end and prepares the surface for a brand new one. Follow those easy steps:
Start with Coarse Grit Sandpaper:
start by sanding with coarse-grit sandpaper, typically around 80-grit. This initial step is crucial for removing the old finish and any surface imperfections. Sand in the direction of the wood grain to avoid scratches and ensure a smooth base.
The coarse grit effectively strips away the existing finish, exposing the bare wood. After this, you can move on to finer grits for a smoother surface.
Move to Medium Grit:
The subsequent step in refinishing eating chairs is to move to medium-grit sandpaper, normally around 120-grit. This step smooths out the roughness left by means of the coarse grit and starts of evolved to refine the surface of the wood.
Sand in the course of the wood grain to avoid scratches and make sure a good end. Medium grit enables to even out any imperfections preparing the chairs for the very last sanding step. This stage is important for reaching a smooth, professional-exceptional end before applying stain or paint.
Finish with Fine Grit:
To complete the sanding process when refinishing dining chairs, finish with fine-grit sandpaper, typically around 220-grit. This final step ensures a smooth, even surface, ready for staining or painting.
Sand gently in the direction of the wood grain to achieve a polished finish without scratches. Fine-grit sandpaper removes any remaining imperfections and prepares the wood to absorb the finish evenly.
Clean the Surface:
Use a mild, damp material to wipe away all dirt and particles left from sanding. This guarantees that the surface is simple and free of particles that could have an effect on the end. Make positive to obtain into crevices and corners to dispose of all dirt. Allow the chairs to dry completely in advance than proceeding with staining or portray. Cleaning the ground is a essential step in attaining a wonderful, expert finish on your refinish dining chairs.
4. Choosing the Right Finish for Chairs:
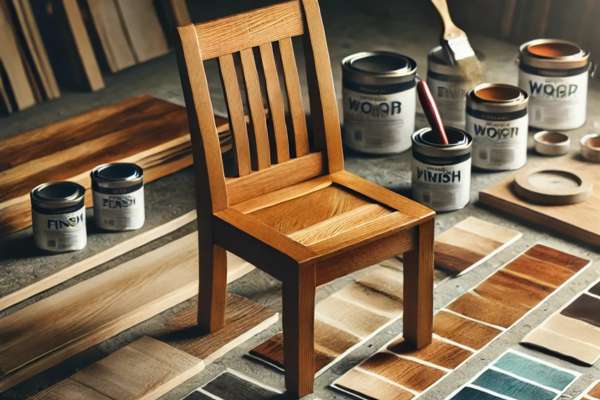
Choosing the right end is essential for each aesthetics and sturdiness. If you’re planning to paint dining chairs, opt for a paint specifically designed for furniture, as it offers better adhesion and resilience.
Latex or enamel paint is ideal for a smooth, durable finish. Latex is easier to apply and clean, while enamel provides a harder, glossy surface that resists scratches.
Before painting, apply a primer to ensure the paint adheres well and provides a uniform color. After painting, consider using a clear topcoat, such as polyurethane, to protect the paint from daily wear and tear.
This topcoat adds an extra layer of durability, ensuring your chairs maintain their fresh look for years.
5. Staining Dining Chairs for a New Look:

Staining dining chairs is an high-quality way to refresh their appearance and convey out the natural beauty of the wood. Whether you select a mild, natural tone or a wealthy, darkish end, staining permits you to customize the look of your chairs.
Before making use of the stain, make certain the chairs are easy and sanded smoothly. Use a easy fabric or brush to use the stain, running in the path of the timber grain for an even end.
Wipe away any excess stain to keep away from blotches. Depending at the desired depth, you may want to apply multiple coats. Allow each coat to dry completely earlier than adding the next.
After staining, recall making use of a clean protecting topcoat to seal the finish and protect the timber. This method will provide your refinish eating chairs a fresh, stylish appearance that enhances your dining area.
6. Applying Protective Coating on Dining Chairs:
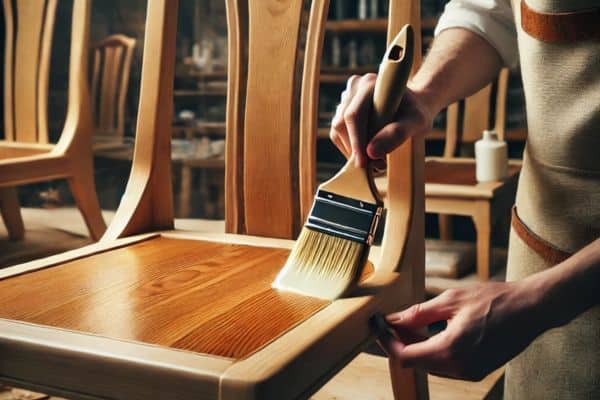
A protective topcoat not only enhances the beauty of the wood but also shields it from daily wear and tear. Polyurethane is a popular choice due to its durability and water resistance. For a natural look, opt for a clear, satin finish, or choose a glossy finish for added shine.
To apply, use a clean brush or cloth, working in smooth, even strokes in the direction of the wood grain. Ensure you cover all areas, including crevices and corners.
Allow the first coat to dry completely before lightly sanding with fine-grit sandpaper, then apply a second coat for added protection.
7. Fixing Minor Damages Before Refinishing Chairs:
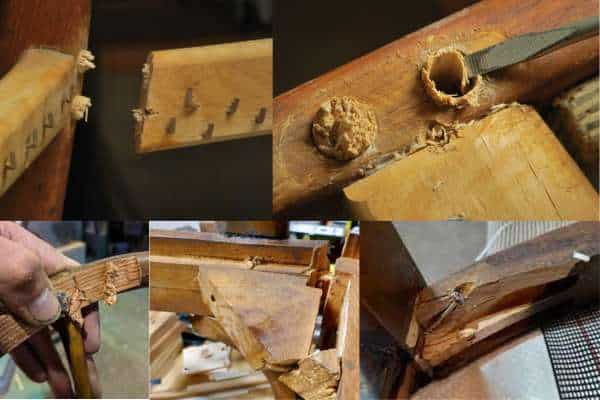
Small cracks, dents, or loose joints can impact the final look and durability of your refinishing work. Begin by inspecting each chair carefully. If you find any cracks or holes, use wood filler to patch them up.
Apply the filler smoothly with a putty knife, and let it dry completely. For loose joints, apply wood glue and clamp the parts together until the glue sets.
Once all repairs are made, sand the filled areas to ensure a smooth, even surface. Taking the time to fix these minor damages will result in a professional-quality finish that will last for years.
8. Proper Drying Time for Refinished Chairs:

After applying paint, stain, or a defensive topcoat, it is essential to present each layer enough time to dry absolutely earlier than transferring directly to the next step.
Rushing this method can cause a sticky end, choppy colour, or even harm to the floor. Typically, stains want as a minimum 24 hours to dry, at the same time as shielding coatings like polyurethane may require up to 48 hours or more, depending on humidity and temperature.
To acquire the best results, vicinity the chairs in a well-ventilated area away from dust and particles. Proper drying time is fundamental to a successful refinish project that enhances the beauty and durability of your dining room chairs.
9. Safety Tips for Refinishing Dining Chairs:
Refinish eating chairs can be a profitable DIY mission, however it’s important to comply with protection tips to guard your self and your workspace. Here are some critical protection recommendations:
- Ensure proper air flow to avoid breathing in fumes from paint, stain, or varnish.
- Use gloves, safety goggles, and a dirt mask to shield your pores and skin, eyes, and lungs from chemical substances and dust.
- Handle sanders, paint strippers, and different equipment with care to avoid injuries. Always observe the manufacturer’s commands.
- Keep flammable materials like paint and solvents faraway from warmth sources, and shop them in tightly sealed packing containers.
- Dispose of used rags, brushes, and leftover substances in keeping with local guidelines to save you fires and environmental harm.
10. Maintaining Your Newly Refinished Dining Chairs:
Start by regularly dusting the chairs with a soft, dry cloth to prevent dirt and debris from settling on the surface.
Avoid using harsh chemicals or abrasive cleaners that could damage the finish. Instead, choose for a mild wood cleaner or polish to enhance the shine and protect the wood.
If the chairs are exposed to direct sunlight, consider repositioning them occasionally to prevent uneven fading.
Additionally, use felt pads under the legs to protect your floors and reduce wear on the chair legs.
FAQ
How to Refinish a Chair Without Stripping
Start by cleaning the chair thoroughly to remove dirt and grease. Lightly sand the surface with fine-grit sandpaper to create a rough texture for the primer to adhere to. Apply a bonding primer designed to stick to glossy surfaces. Once the primer is dry, you can paint or stain the chair as desired. Finish with a protective topcoat to seal the new finish.
How Do You Refinish a Chair?
Sand the chair using coarse-grit sandpaper to put off the old finish, observed by using finer grits for a smooth surface. If wished, practice wood filler to repair any cracks or holes. Once sanded, follow your selected stain or paint in thin, even coats, permitting every to dry completely. Finally, seal the chair with a protective topcoat, which includes polyurethane, to defend the brand new finish. This method will repair your chair and provide it a clean, up to date look.
How Do I Protect the Finish on My Refinished Chairs?
To protect the finish on your refinish dining chairs apply a clear topcoat, such as polyurethane or lacquer, after the paint or stain has dried. This protective layer shields the chairs from scratches, spills, and daily wear. Choose a finish—matte, satin, or gloss—based on your desired look. Apply the topcoat in thin, even layers, allowing each coat to dry completely before applying the next. For added protection, consider using felt pads on the chair legs to prevent damage to both the finish and your floors.
Do I Need to Remove the Old Finish Completely?
Yes, removing the vintage finish absolutely is important when refinishing dining chairs. Start by way of sanding the chairs with coarse-grit sandpaper to strip away the antique end, then switch to finer grits for a clean surface. In some instances, you might use a chemical stripper to assist with this procedure. Thoroughly disposing of the old end is prime to achieving a professional, long-lasting result that complements the splendor of your eating chairs.
Conclusion:
By following the right steps—from making ready the chairs and solving any minor damages to carefully applying the cease and shielding coating—you can obtain a professional-best end result. Patience and interest to element are key at some stage in the technique, ensuring that your chairs not best appearance beautiful however are also durable enough to face up to day by day use. Whether you’re restoring vintage chairs or modernizing a hard and fast, refinishing is a fulfilling manner to transform your dining room.