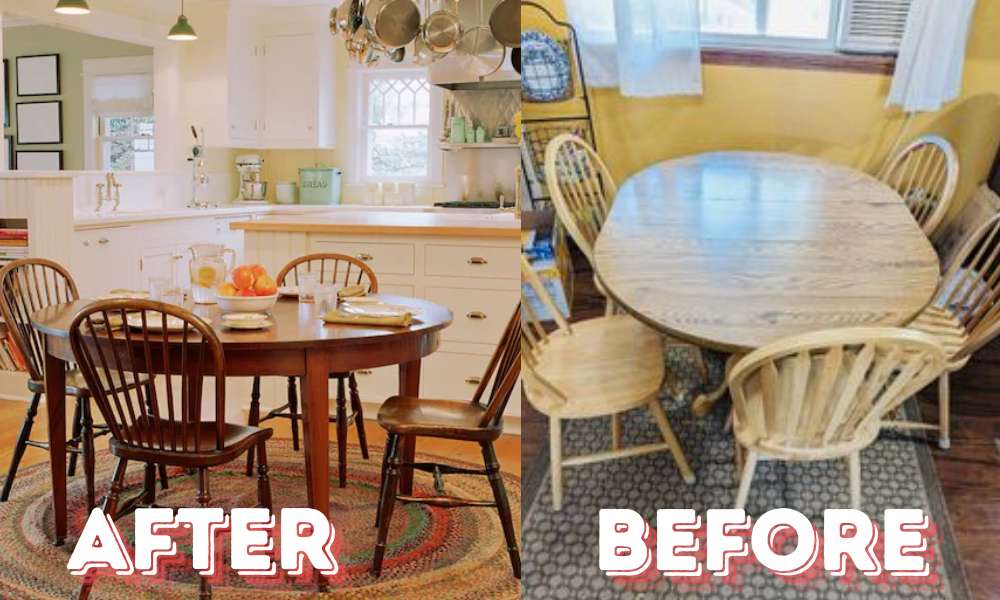
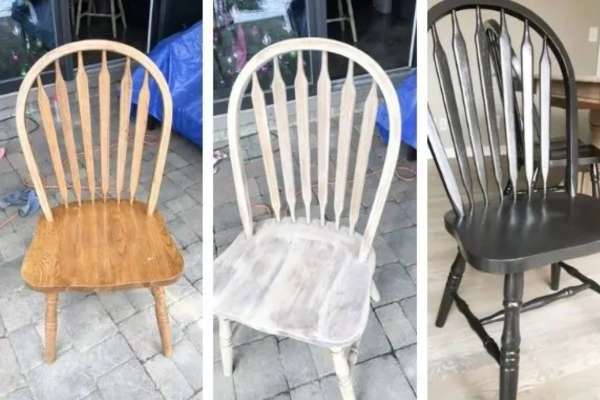
Whether your chairs are solid timber or have upholstered seats, refinishing permits you to personalize their look to in shape your contemporary décor. The procedure includes a few key steps, along with stripping the old end, sanding, making use of a new stain or paint, and sealing the floor. By refinishing your dining room chairs, you not most effective decorate their appearance however also expand their lifespan. This manual will walk you via the critical steps on the way to refinish dining room chairs.
1. Assessing Your Refinish Dining Room Chairs’ Condition:
Take a close look at the chairs to identify any damage, such as cracks, loose joints, or worn-out areas. Check the stability of the legs and the sturdiness of the frame.
If there are any structural issues, it’s essential to repair them before moving forward. Additionally, examine the current finish—whether it’s chipped, faded, or simply outdated—to determine the level of refinishing needed.
This initial assessment will help you decide on the best approach, whether it’s a simple touch-up or a complete overhaul.
2. Choosing the Right Refinishing Tools:
- Screwdriver Set
- Sandpaper
- Orbital Sander
- Paint Stripper
- Putty Knife
- Wood Filler
- Paintbrushes
- Tack Cloth
- Drop Cloths
- Protective Gear
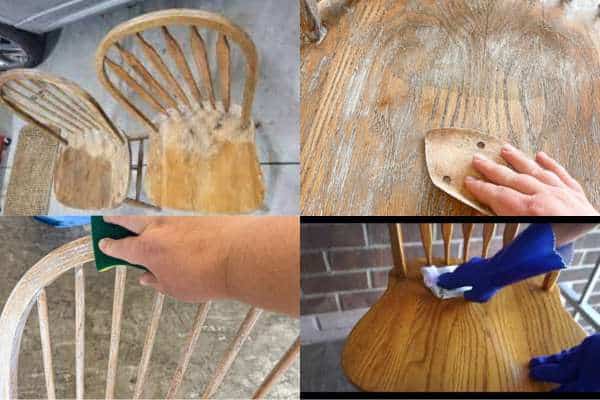
3. Removing Old Finish from Chairs:
Follow the product instructions carefully, usually allowing the remover to sit for the recommended time to soften the old finish.
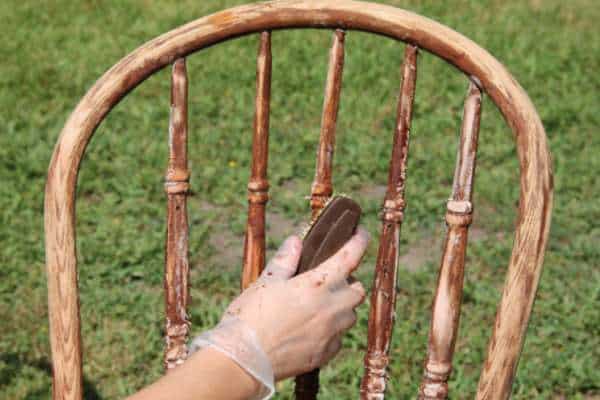
Once it has loosened, use a putty knife or scraper to gently remove the finish, being careful not to gouge the wood. For intricate areas or hard-to-reach spots, a small wire brush or steel wool can help lift the remaining finish.
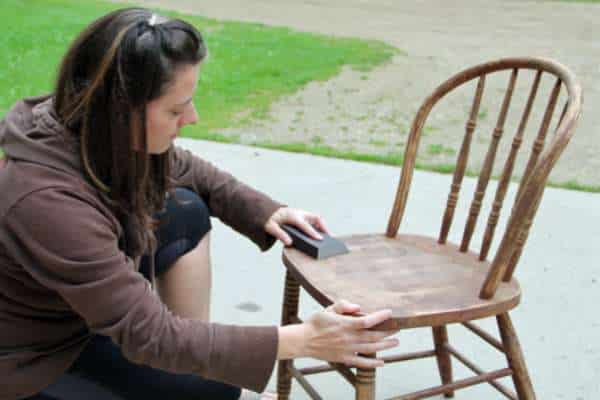
After scraping off the bulk of the old finish, sand the entire chair with medium-grit sandpaper to remove any lingering residue and to smooth the surface. This step ensures that the new finish will adhere properly.
4. Sanding Down Wooden Chair Surfaces:
Begin by using medium-grit sandpaper to remove any remaining traces of the old finish and to level out any rough spots.
Sand in the direction of the wood grain to avoid scratches that could show through the new finish. For curved or detailed areas, consider using a sanding sponge or small piece of sandpaper to get into the nooks and crannies.
After the initial sanding, switch to fine-grit sandpaper to further smooth the wood, creating a clean, even surface ready for staining or painting. Be thorough, as any imperfections left at this stage will be more noticeable once the new finish is applied.
Once sanding is complete, wipe down the chairs with a tack cloth to remove any dust, ensuring a flawless finish in the next steps.
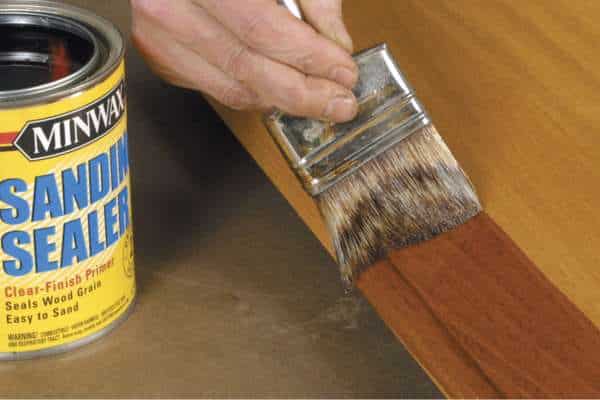
5. Applying Primer for Smooth Paint Finish:
Primer not best allows the paint adhere higher to the timber however additionally covers any imperfections, making sure an excellent floor. Start by means of deciding on a remarkable primer appropriate for wooden furniture.
Apply the primer frivolously throughout all surfaces of the chairs, the use of a brush or spray relying to your choice. Make sure to get into all the crevices and specified areas to make certain complete coverage.
Allow the primer to dry absolutely, following the producer’s commands, typically some hours. Once dry, lightly sand the chairs with first-class-grit sandpaper to easy out any brush marks or choppy regions.
This step is vital for reaching a professional-looking finish whilst you paint dining chairs, ensuring that the final end result is smooth, even, and durable.
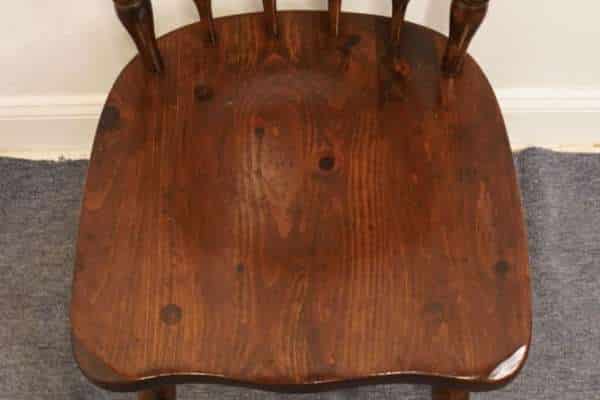
6. Selecting Appropriate Paint or Stain:
The decision largely depends on the look you want to achieve and the type of wood your chairs are made of. If you prefer a solid, opaque finish that hides the wood grain, go for high-quality furniture paint.
Chalk paint or latex paint can offer a smooth, stylish finish. On the other hand, if you want to highlight the natural beauty of the wood, a stain is your best choice.
Stains come in various shades, from light to dark, allowing you to enhance the wood’s natural patterns. Consider the overall decoration of your dining room when selecting the color.
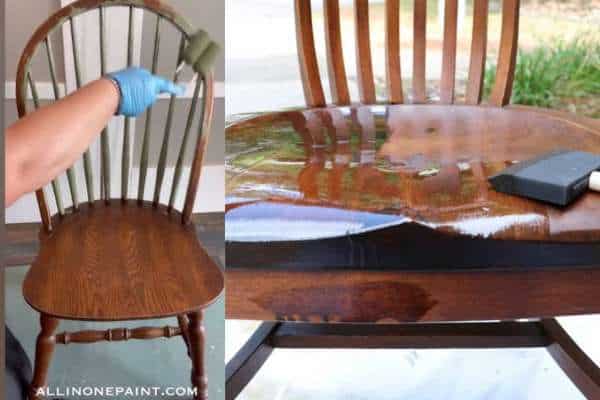
7. Applying Paint or Stain Evenly:
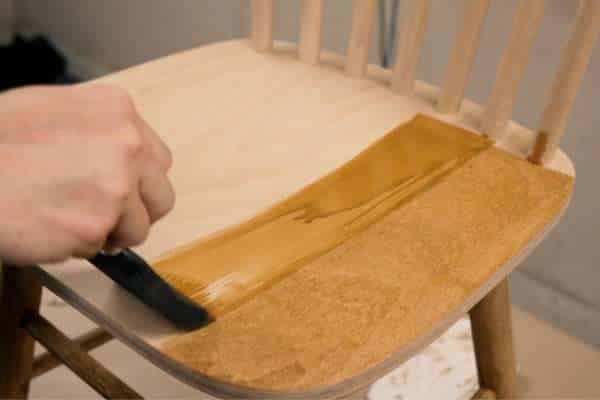
Start by stirring the paint or stain thoroughly to ensure a consistent color and texture. If you’re using paint, apply it with a high-quality brush or foam roller in long, even strokes, following the direction of the wood grain.
For stain, use a clean, lint-free cloth or brush, working it into the wood in the direction of the grain to avoid streaks. Apply thin coats, allowing each one to dry completely before adding another layer.
This method prevents drips and ensures a smooth, even finish. Pay special attention to corners and edges, where paint or stain can pool. If needed, lightly sand between coats with fine-grit sandpaper to maintain a smooth surface.
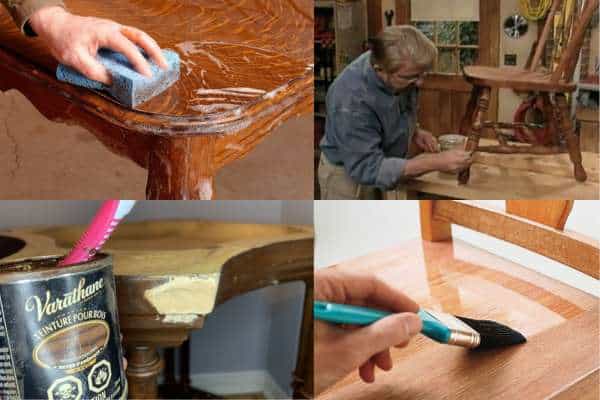
8. Protecting Finish with Sealant Application:
Choosing the Right Sealant:

In the first place select a sealant that matches the finish you’ve applied to your dining room chairs. Polyurethane is a popular choice for its durability and comes in various sheens—matte, satin, or glossy. Ensure the sealant is compatible with the paint or stain you’ve used.
Preparing the Surface:
Before applying the sealant, make sure the painted or stained surface is completely dry. Lightly sand the chairs with fine-grit sandpaper to smooth out any imperfections. Wipe away dust with a tack cloth to ensure a clean surface.
Applying the Sealant:
At first using a clean brush, apply the sealant in thin, even coats. Follow the direction of the wood grain to prevent streaks. Allow each coat to dry fully before applying the next, usually around 24 hours between coats.
Final Inspection and Touch-Ups:

Once the final coat is dry, inspect the chairs for any missed spots or uneven areas. Lightly sand and reapply sealant if needed. This step ensures a smooth, durable finish that protects your refinish dining room chairs for years to come.
9. Reassembling and Inspecting Dining Chairs:
After refinishing your dining room chairs, it’s time to reassemble and inspect them to ensure they are sturdy and ready for use. Here’s a simple guide:
Reattach Components:
Reattaching any parts you disassembled, such as seats, backs, or legs, ensuring all screws and bolts are tightened securely. That is check each component for proper alignment to maintain the chair’s stability.
Once reassembled, inspect the finish for any missed spots or imperfections, and touch up if necessary. Finally, test the chair by sitting on it to ensure it’s comfortable and stable.
Check for Stability:
After refinishing your dining room chairs, reassemble them carefully and check for stability. That is place each chair on a flat surface and test for any wobbling or unevenness.
Tighten all screws, bolts, and joints to ensure the chair is solid and secure. If any adjustments are needed, make them before the final inspection.
Inspect the Finish:
Look for any areas where the paint or stain might be uneven or where the sealant may have pooled. Check for missed spots or rough patches that could affect the overall appearance. If you notice any imperfections, lightly sand the area and apply a touch-up coat of paint or stain.
Final Test:
Reattaching all parts, ensuring screws and bolts are securely tightened. Place the chairs on a flat surface to check for stability and make any necessary adjustments.
Finally, sit on each chair to conduct a final test for comfort and sturdiness. Listen for any cracks or signs of instability. Following these steps will ensure your refinish dining room chairs are both beautiful and functional.
10. Maintaining Refinish Dining Chairs Long-Term:
Maintaining your refinish dining room chairs long-term is essential to keep them looking beautiful and extending their lifespan.
For deeper cleaning, use a damp cloth with mild soap, but avoid soaking the wood.
Periodically check the chairs for any signs of wear, such as scratches or loose joints, and address these issues promptly to prevent further damage.
Applying a fresh coat of furniture polish or wax every few months can help preserve the finish.
Do you have to sand dining room chairs before painting?
Yes, you should sand dining room chairs before painting them. Sanding helps to remove any old finish, smooth out imperfections, and create a surface that allows the new paint to adhere better. Even a light sanding is enough to improve the final result, ensuring a smoother and more durable finish. So, always sand your chairs before painting for the best results
How do you refinish a chair?
Refinishing a chair entails some key steps. First, investigate the chair’s circumstance and make any essential maintenance. Then, put off the antique finish using a paint stripper or sandpaper. After that, sand the chair very well to create a easy surface. Apply a primer if you plan to color, or move immediately to making use of your selected stain. Finally, defend the finish with a sealant.
What tools do I need to refinish dining chairs?
To refinish dining room chairs, you will need some important equipment:
- Screwdriver Set: For disassembling the chairs.
- Sandpaper or Orbital Sander: To smooth the wood surfaces.
- Paint Stripper: For removing old paint or varnish.
- Putty Knife: To scrape off the old finish.
- Paintbrushes or Stain Applicators: For applying the new finish.
- Sealant: To protect the final finish.
- Tack Cloth: To remove dust after sanding.
How can I protect the new finish?
To protect the new finish on your refinish dining room chairs, apply a clear sealant like polyurethane. This adds a protective layer that guards against scratches, moisture, and daily wear. Make sure to apply the sealant in thin, even coats, allowing each coat to dry fully before adding the next. Regularly dust the chairs and avoid placing them in direct sunlight to prevent fading.
Final touch:
By carefully assessing the circumstance of your chairs, selecting the right equipment, and following every step from stripping the antique end to applying a protecting sealant, you can obtain professional outcomes at domestic. Whether you pick out to color or stain your chairs, the secret’s to work methodically and pay attention to info. This DIY assignment now not best complements your dining room but additionally permits you to experience the delight of restoring and personalizing your furnishings. With the right approach, your refinish dining room chairs will stay a centerpiece of comfort and style in your private home.