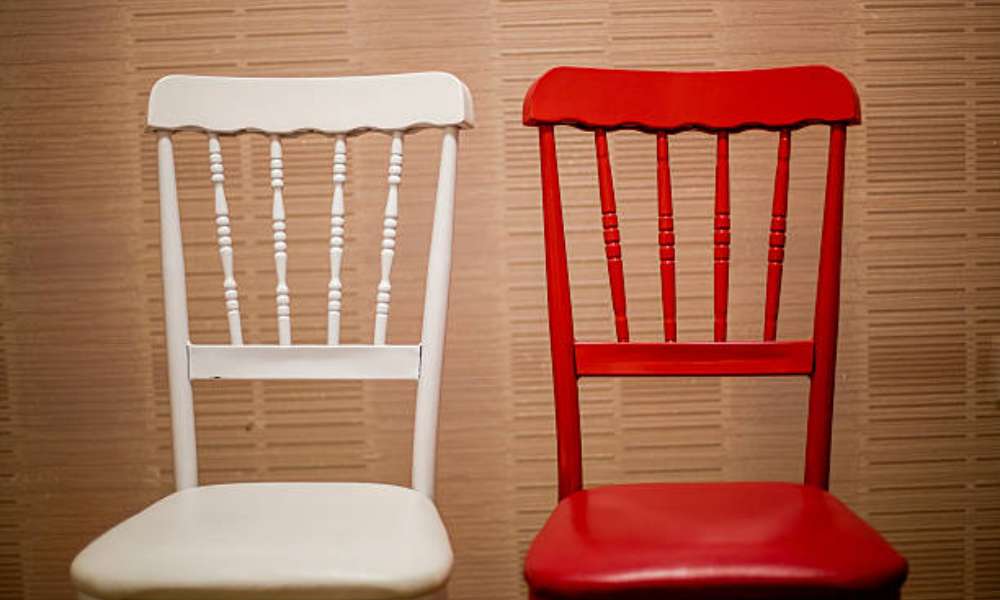
Repaint dining room chairs is a terrific manner, to respire new existence into your furniture and refresh your dining area with out breaking the bank. Whether your chairs are searching a bit worn otherwise you genuinely need a brand new color scheme, repainting can make a considerable distinction. It’s a value-powerful answer that allows for creativity and customization, remodeling ordinary chairs into unique, stylish pieces that enhance your own home’s decoration. In this guide, we will stroll you through the steps to repaint your dining room chairs.
1.Choosing the Right Paint:
Three popular types of paint for chairs are latex, chalk, and oil-based paints.
1.Latex paint: Is water-based, easy to clean, and dries quick. However, it is able to chip over the years.
2.Chalk paint: Gives a clean, matte end and is simple to apply with minimal prep work. It’s top notch for reaching a country appearance however requires a protecting topcoat to ensure durability.
3. Oil-based: Totally paint gives a sturdy, smooth finish this is surprisingly durable. It’s best for furniture that sees numerous use however has an extended drying time and emits robust fumes in the course of utility.
By choosing the right paint, you can maintain the look and durability of paint dining chairs.
2.Gathering Necessary Supplies:
To repaint dining room chairs, gather these essential tools and materials:
- Paint (your chosen type)
- Primer
- Sandpaper (various grits)
- Paint Brushes or paint sprayer
- Drop cloths or old sheets
- Painter’s tape
- Screwdriver (for disassembling chairs)
- Cleaning supplies (soap, water, cloths)
For a professional finish, consider these optional extras:
- Sealant or topcoat for added protection
- Wood filler for repairing damage
- Stencils for decorative designs
- Wax for a smooth finish
3.Preparing Your Workspace:
Before you start repaint your dining room chairs, it’s important to prepare your workspace. Choose a well-ventilated area, like a garage or an outdoor space, to ensure good airflow and avoid inhaling fumes. Lay down drop cloths or old sheets to protect your floors from paint splatters.
Move any nearby furniture or cover it with plastic sheeting to prevent accidental spills. Make sure you have enough light to see your work clearly. Set up a sturdy table or sawhorses to place the chairs on, making them easier to paint.
4.Prepping the Chairs:
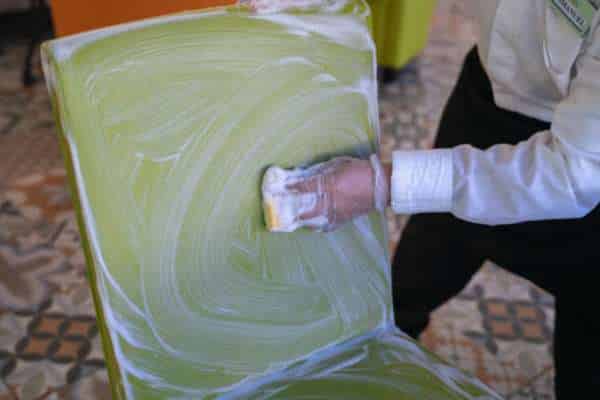
Prepping your dining room chairs is a critical step before you start repainting. Begin by cleaning the chairs thoroughly to remove any dirt, dirt, or grease. A combination of soap and water works well for this undertaking. Make sure to dry the chairs absolutely before transferring on to the subsequent step.
Next, sand the chairs to create a easy surface for the paint to stick to. Use medium-grit sandpaper to gently sand the whole floor, paying extra attention to areas with antique paint or varnish. After sanding, wipe the chairs with a moist material to dispose of any dirt.
Inspect the chairs for any harm or imperfections. Fill any cracks, holes, or dents with timber filler and permit it dry consistent with the producer’s instructions. Once the filler is dry, sand those areas again until they are clean and level with the rest of the chair.
Taking the time to nicely prep your chairs will make sure a easy and durable finish, making your repainting task appearance professional and remaining longer. Prepping the chairs nicely is the foundation for a successful and enjoyable DIY venture.
5.Priming the Chairs:
- Choose the Right Primer: Select a primer that is compatible with the type of paint you are using, whether it’s latex, chalk, or oil-based.
- Prepare the Surface: Make sure the chairs are clean and sanded. Wipe them down with a damp cloth to remove any dust.
- Apply the Primer: Use a high-quality brush or a paint sprayer to apply a thin, even coat of primer. Start at the top of the chair and work your way down, covering all surfaces. Avoid overloading your brush or sprayer to prevent drips and runs.
- Let it Dry: Allow the primer to dry completely, following the manufacturer’s instructions for drying times. This usually takes a few hours.
- Sand Lightly: Once the primer is dry, lightly sand the chairs with fine-grit sandpaper to smooth out any rough spots. Wipe away the dust with a clean cloth.
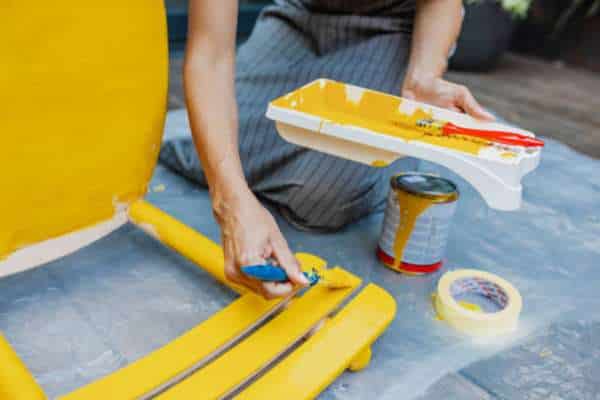
6.Painting Techniques:
1.Brush Painting:
- Pros: It’s more accessible and gives you control over the application. Ideal for small or intricate areas.
- Cons: Can leave brush marks if not applied carefully.
- Tips: Use a high-quality brush to minimize streaks. Apply thin coats, allowing each layer to dry before adding the next. Work in smooth, even strokes to achieve a consistent finish.
2.Spray Painting:
- Pros: Provides a smooth, even coat with no brush marks. Great for larger surfaces and quicker application.
- Cons: Requires more preparation and can be messy.
- Tips: Ensure proper ventilation. Shake the spray well before use. Keep the can at a consistent distance from the chair (about 12 inches) and use sweeping motions to apply the paint evenly. Apply multiple light coats instead of one heavy coat to prevent drips and runs.
Both methods can yield beautiful results. Choosing the right technique depends on your comfort level and the specific needs of your project. With patience and attention to detail, your dining room chairs will look professionally painted.
7.Add Finishing Touches:
After repainting your dining room chairs, adding completing touches is critical for a elegant and long-lasting appearance. Applying a sealant or topcoat protects the paint from wear and tear, ensuring your hard paintings lasts.
1.Applying a Sealant or Topcoat:
- Choose the Right Product: Select a clear sealant or topcoat compatible with your paint type (latex, chalk, or oil-based).
- Application: Use a high-quality brush or sprayer to apply a thin, even layer of sealant. Allow it to dry completely before applying additional coats if needed. Follow the manufacturer’s instructions for the best results.
2.Optional Distressing or Decorative Techniques:
- Distressing: For a vintage or shabby chic look, gently sand the edges and high points of the chairs after the paint has dried. This creates a worn, rustic appearance.
- Decorative Techniques: Add personal touches with stencils, decals, or hand-painted designs. Use painter’s tape to create clean lines for geometric patterns or stripes.
These finishing touches no longer most effective enhance the arrival of your dining room chairs however additionally provide more protection, making sure they stay stunning and purposeful for years to come.
Whether you decide upon a graceful modern end or a fascinating distressed look, those techniques will add the perfect very last contact on your mission.
8.Drying and Curing Time:
Proper drying and curing time is critical whilst repaint dining room chairs to make certain a durable, expert end. Knowing how lengthy to wait between coats and making sure the paint is fully cured can make a great distinction.
1.How Long to Wait Between Coats:
- Latex Paint: Typically, wait 2-4 hours between coats. This allows the paint to dry enough to apply the next layer without causing smudges or unevenness.
- Chalk Paint: Usually, a drying time of 1-2 hours is sufficient. However, always follow the paint manufacturer’s instructions for the best results.
- Oil-Based Paint: These paints require longer drying times, generally 6-8 hours between coats.
2.Ensuring the Paint is Fully Cured:
- Curing is different from drying: While paint may feel dry to the touch within hours, it takes longer to fully cure and harden.
- Latex and Chalk Paint: Typically, these types of paint take about 2-4 weeks to fully cure.
- Oil-Based Paint: This type can take up to 7 days to a month to cure completely.
During this time, avoid heavy use of the chairs to prevent dents, scratches, or other damage. Being patient and allowing adequate drying and curing time will ensure your dining room chairs look beautiful and last longer.
9.Reassembling the Chairs:
After repainting your dining room chairs, the next step is reassembling them. This involves reattaching the seats and any hardware to ensure they are ready for use.
1.Reattaching Seats and Hardware:
- Gather All Parts: Make sure you have all the screws, bolts, and any other hardware that you removed during the preparing stage.
- Attach the Seats: If your chairs have detachable seats, align them correctly and secure them with screws or bolts. Use a screwdriver or drill to tighten them properly.
- Reattach Hardware: If there are any additional parts such as arms or decorative pieces, reattach them following the same process. Ensure everything is tightened securely to avoid any wobbling or instability.
2.Final Inspection for Touch-Ups:
- Check for Imperfections: Look over each chair to spot any areas where the paint might have chipped or where the coverage is uneven.
- Touch Up: Use a small brush to touch up these spots. Apply a thin layer of paint and let it dry completely.
- Final Wipe Down: Once the touch-ups are dry, give the chairs a final wipe down to remove any dust or residue.
Reassembling and inspecting your dining room chairs carefully ensures they are sturdy, safe, and look professionally finished. Enjoy your refreshed dining space!
10.Maintaining Your Repainted Chairs:
Proper protection of your newly repainted dining room chairs guarantees their toughness and keeps them searching sparkling. Here are a few easy suggestions for cleansing and stopping damage.
1.Cleaning Tips for Longevity:
- Regular Dusting: Dust the chairs weekly with a soft cloth to prevent dirt buildup.
- Gentle Cleaning: Use a mild soap solution and a damp cloth for deeper cleaning. Avoid harsh chemicals that can damage the paint.
2.Preventing Scratches and Chips:
- Use Pads: Attach felt pads to the bottom of the chair legs to prevent scratches on the floor and reduce wear on the paint.
- Handle with Care: Avoid dragging the chairs across the floor. Lift them when moving to prevent chips and scratches.
- Protective Measures: Use placemats or cushions to protect the paint from heavy use or accidental impacts.
FAQs
1. Can I use any type of paint for dining room chairs?
It’s quality to apply long lasting paints like latex, chalk, or oil-based paints. Each has specific properties, so choose one which suits your needs and choices.
2. How long should I wait between coats of paint?
Follow the paint manufacturer’s instructions, but typically, you should wait 2-4 hours between coats.
3. Do I need to sand the chairs before painting?
Yes, sanding allows create a floor that the paint can adhere to better, ensuring a smoother and longer-lasting end.
4. Is primer necessary before painting?
Using a primer is recommended as it helps the paint adhere better and provides a more even finish.
5. How can I prevent brush marks when painting?
Apply thin, even coats and permit every coat dry absolutely before applying the subsequent. Using a notable brush or a paint sprayer can also assist gain a smoother end.
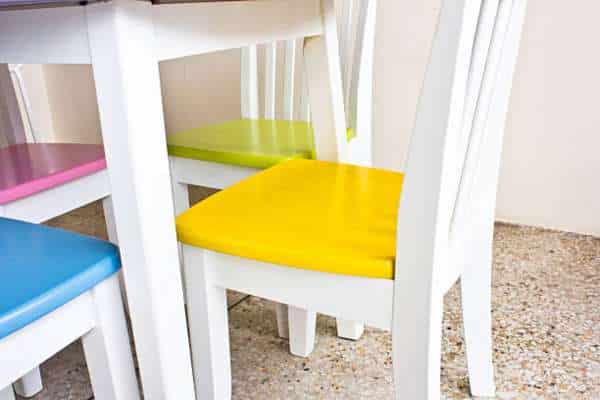
Conclusion:
Repainting your dining room chairs can definitely refresh your dining place. Reflect on the transformation you’ve accomplished with just a few paint and effort. Your vintage chairs now appearance new and elegant, together with appeal in your dining area. You’ve stored cash through the usage of no longer looking for new fixtures and created something particular that fits your style flawlessly. This achievement might probably even encourage you to tackle extra DIY projects within the future.